This overview is aimed at helping you quickly get your students into the Wordchain for Web system and on the path to improving their reading and spelling!
If you prefer video instructions, there is an extensive video walkthrough of setting up here.
There are 4 steps. The first two must be done by an Admin, the next two by an Admin or Teacher.
Let’s look at them in more detail.
Note: the following instructions assume you are logged in. If you are not, here’s how to log in.
ADMINS
There are two initial steps:
1. Buy Licenses
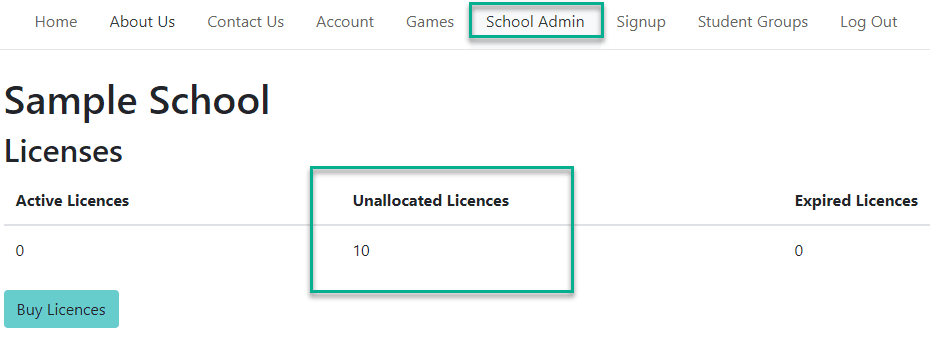
If you have any licenses, they should show in SCHOOL ADMIN under “Unallocated Licenses”.
Licenses can be purchased by credit card or invoice, but invoices are only available to GST-registered educators and educational institutions. Once ordered, your licences should be immediately available for allocation to students.
You have 6 months to allocate a licence before it expires, and a licence runs for 6 months from the day it is allocated.
If you haven’t ordered any licenses, click the blue Buy Licenses button and choose how many and whether to pay by Credit Card or Invoice:

2. Create STUDENT GROUPS.
In SCHOOL ADMIN, click the blue Add Student Group button to name the group and assign a TEACHER email to it:

Student Groups help organise Students, eg: “Class 1”, “Class 2” or “Tuesday”, “Thursday”.
Note: The teacher assigned to the Student Group should check their email (and possibly their spam folder!) for an email that will let them set their password.
For parents, caregivers or others who may not have many students to organise, just make one group and call it “My Kids” (or whatever makes sense to you).
SCHOOL ADMINS:
You can use this link to send an email welcoming your teachers and pointing them to the “Teachers and Wordchain” support document. It may save questions from coming your way!
TEACHERS (and/or ADMINS)
IMPORTANT message for Teachers: if the Admin has added you to a Student Group, you should have received an email inviting you to set a password for your account. If you have not, check your SPAM folder. If you still can’t find it, please do an Email Password Reset or get your Admin to change your password and let you know the login details.
Once the admin has set up the STUDENT GROUPS as shown above, there are two further steps:
3. Add Students to the Student Groups
Note: we’re working on bulk-upload for students, but it’s not currently public-facing.
Contact us if you would be interested in this.
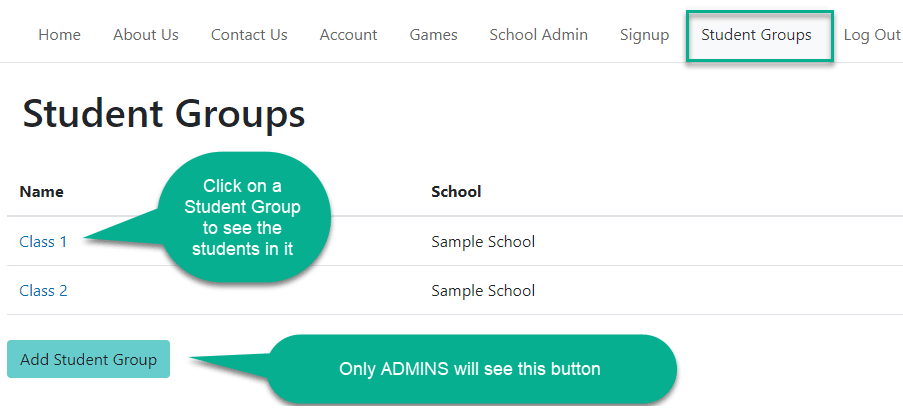
Log in and go to STUDENT GROUPS. Click on the appropriate Student Group:

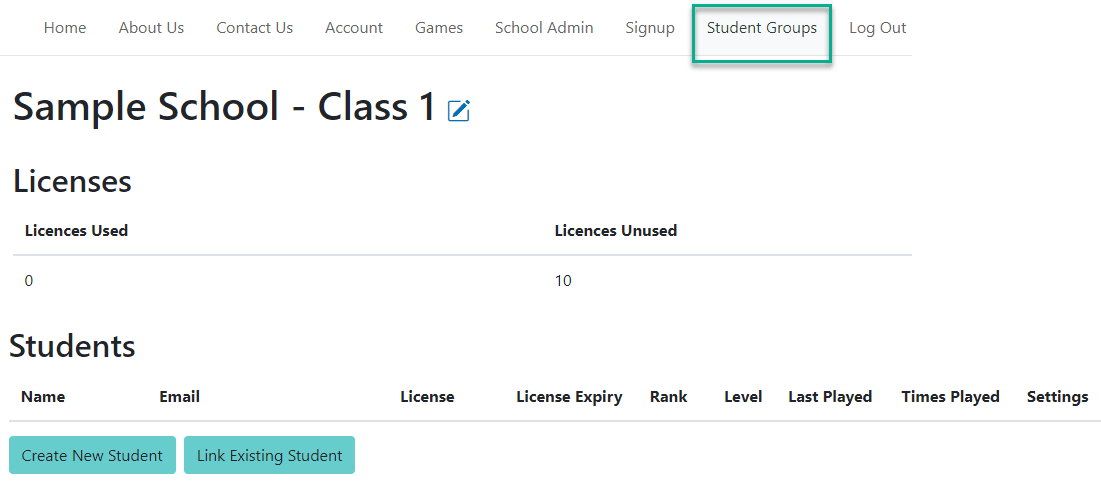
In the chosen Student Group (in this example, “Class 1”) click the blue Create New Student button:

You will be asked to enter their email and/or username. You will then be asked for their first and last name and a password. When you’ve filled that in, the student will appear in the Student Group.
4. Assign the Student a Licence
Note: Only students need licences; Admins and Teachers do not.
Click the blue Add License button next to the student:

You will be asked for a Wordchain number for the student to begin on.
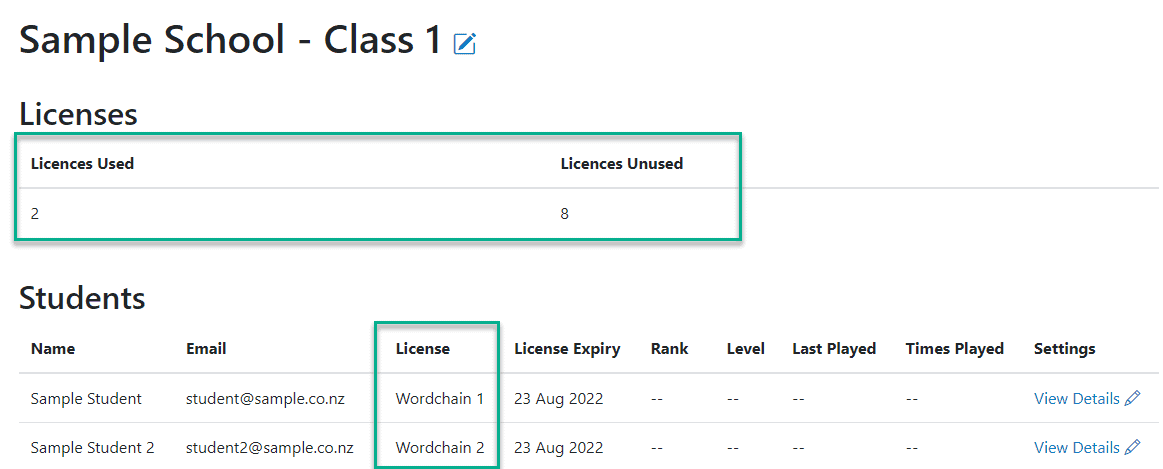
Here’s an example with two students added, with the first set to Wordchain 1 and the second to Wordchain 2.
Note that two licenses are now “Used”, leaving 8 unallocated:

Your students can now log in with their email (or username) and password at play.wordchain.co.nz
Full details about how to log in are here.
(There are also two ways to reset student passwords if they forget them.)
That’s it! Your students will be away and flying!
There are more support articles and videos at wordchain.co.nz/support or contact us if you need any help.
