These instructions are aimed at getting your child registered for Wordchain and on the path to improving their reading and spelling!
NOTE: This document assumes you’ve already signed up for a Parent/Caregiver account at play.wordchain.co.nz/school-signup/
Just before we start: Wordchain for Web has extra functionality for schools that may be overkill for parents and caregivers.
There are three roles in Wordchain for Web: Admin, Teacher, Student.
For parent/caregiver purposes, the Admin and Teacher can be the same person/email, and the Student will be your child.
Wordchain for Web has Student Groups for organising students into classes/groups.
For parent/caregiver purposes, you’ll just need one Student Group (eg: “The kids”, “My group” or “Tamariki”).
There are 4 steps in setting up – if you’ve already bought a licence or two, you’ve completed step 1!
- Buy a license (or licences)
- Create a Student Group
- Add a Student (your child) to the Student Group
- Assign a License to the Student.
Let’s look at them in more detail. In the example below, the ‘organisation’ that was signed up is “The Sample Family”.
Note: the following instructions assume you are logged in. If you are not, here’s how to log in.
1. Buy Licenses
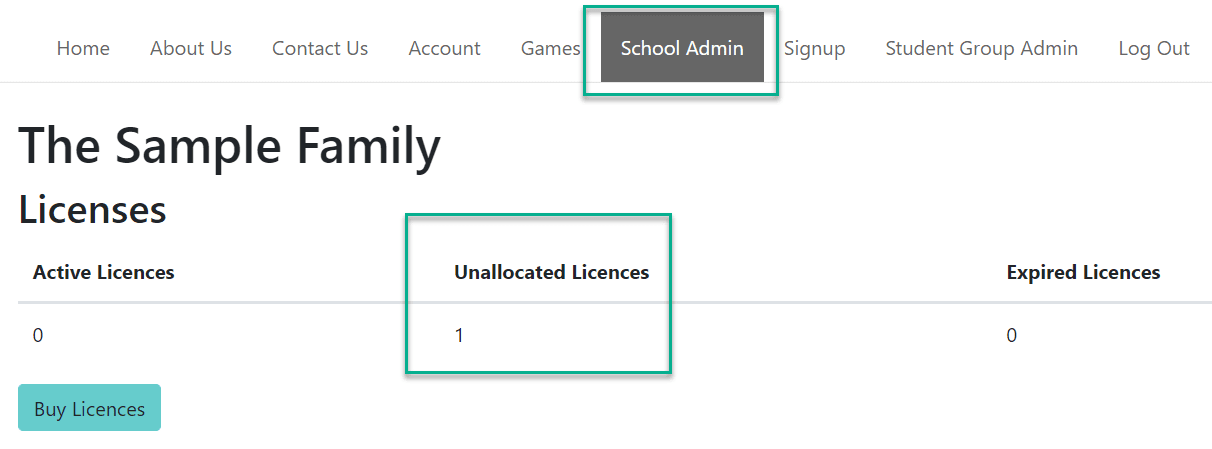
If you have any licenses, they should show in SCHOOL ADMIN under “Unallocated Licenses”.
Licenses can be purchased by credit card or invoice, but invoices are only available to GST-registered educators and educational institutions. Once ordered, your licences should be immediately available for allocation to students.
You have 6 months to allocate a licence before it expires, and a licence runs for 6 months from the day it is allocated.
If you haven’t ordered any licenses, click the blue Buy Licenses button and choose how many and whether to pay by Credit Card or Invoice:
2. Create a STUDENT GROUP.
Click on the STUDENT GROUPS menu item. You’ll see at the moment that there aren’t any Student Groups that you teach, so click on the blue button to add one:

That will bring up this dialogue box asking for a name for the group:
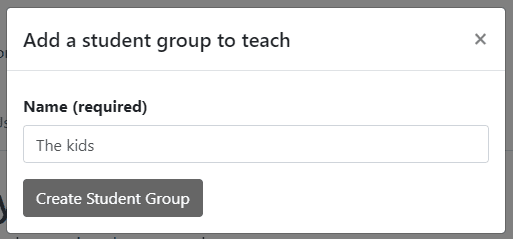
You can name your group “My kids” or “Tamariki” or whatever you like!
Student Groups are most useful for schools that might have multiple classes or rooms of students.
Here we’ve just called the group “The Kids”:
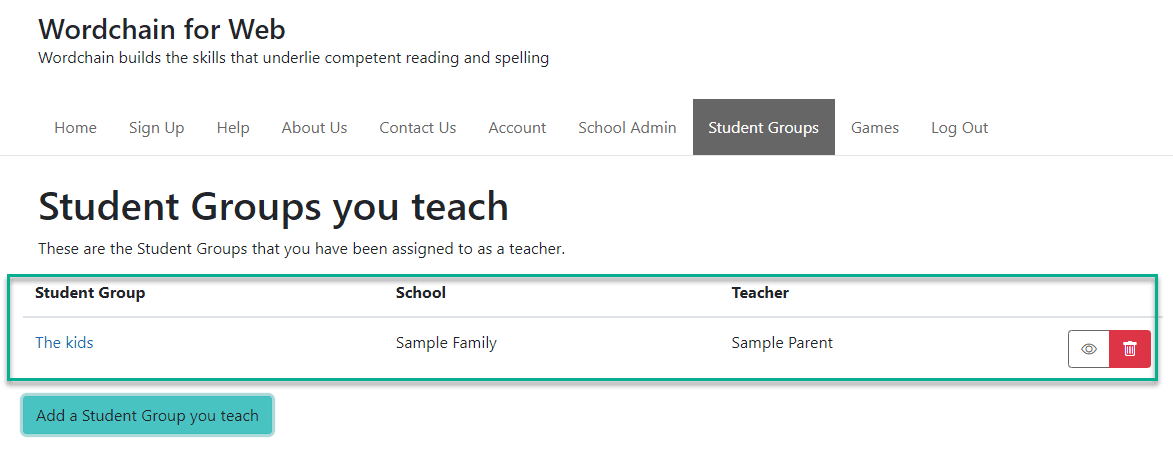
Now we have a Student Group, let’s add a Student to it!
3. Add a Student to the Student Group
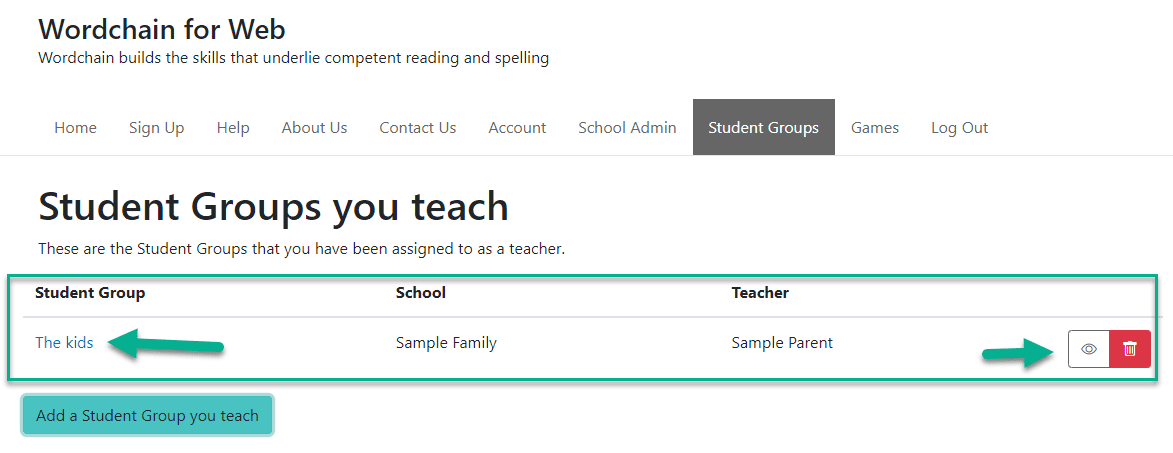
Make sure you’re still on the STUDENT GROUPS page and click the Student Group name – in this case, “The kids” – or on the EYE icon at the right:
Now you’re in the Student Group itself. In the picture below, you can see you’re the teacher, but there are no students:
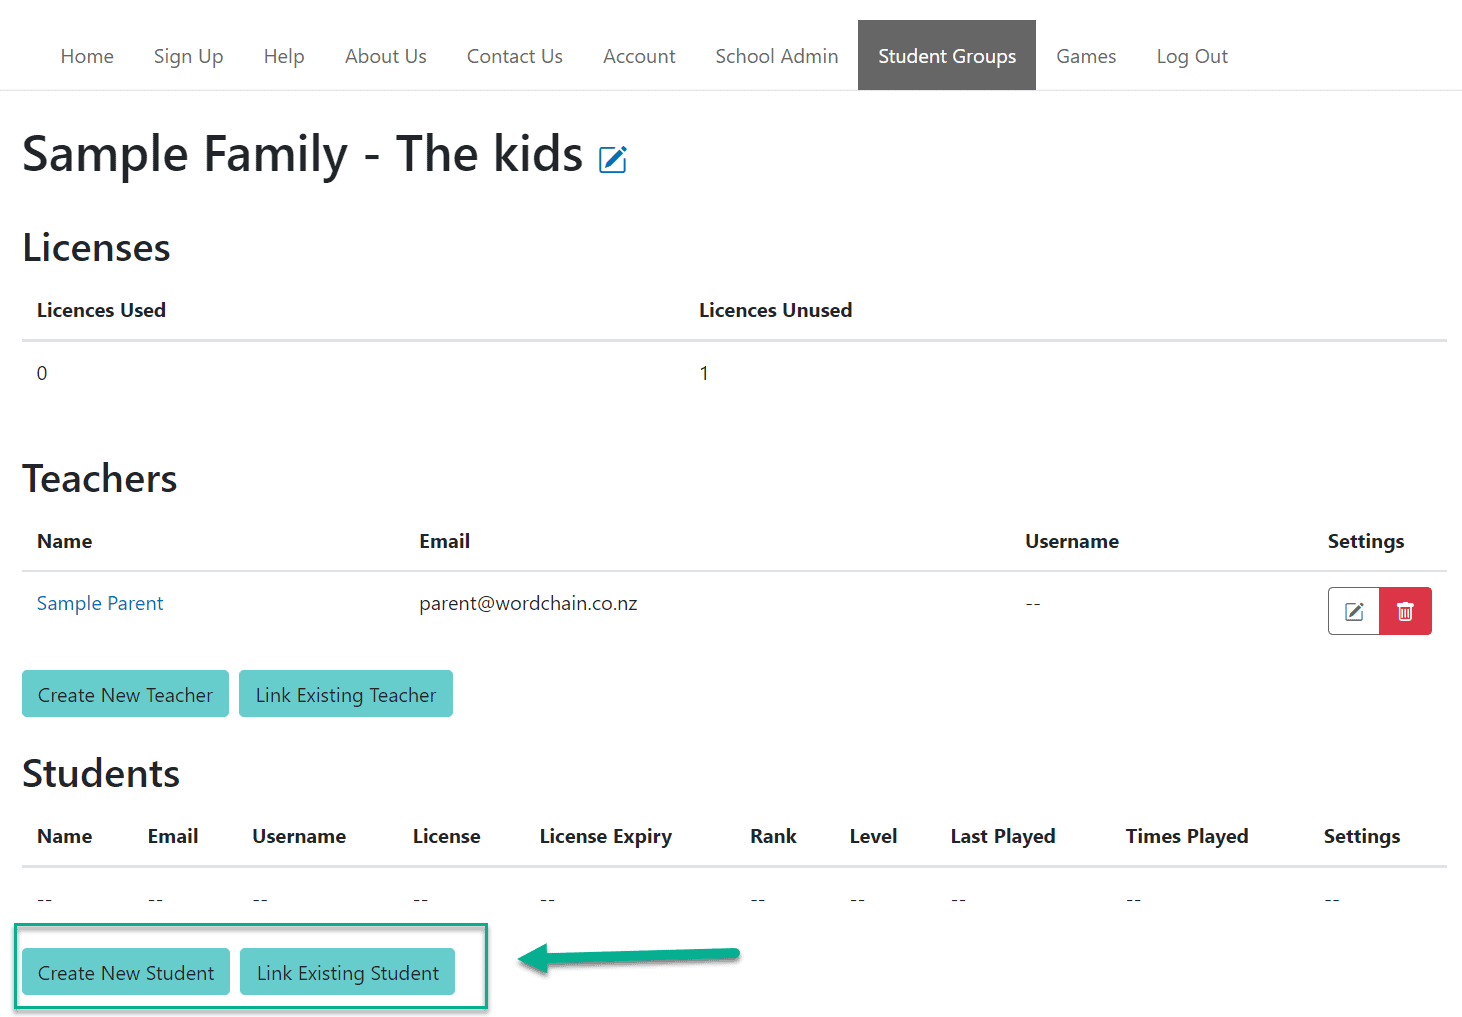
Usually, you’ll want to click CREATE A NEW STUDENT. However, if your child has already been using Wordchain for Web at school and you want to link to their existing account and saved progress, then click LINK EXISTING STUDENT.
CREATE A NEW STUDENT
To create a NEW student, you will be asked to enter their email and/or username:
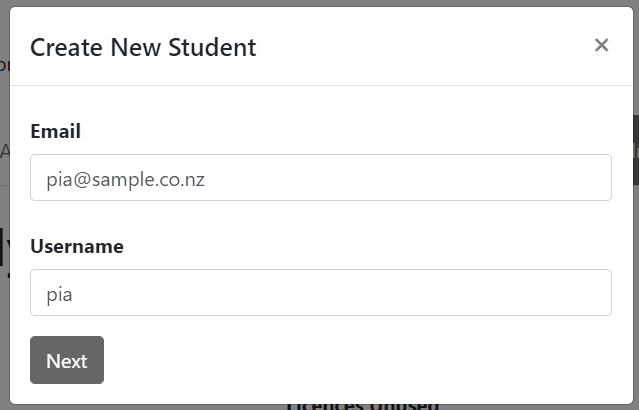
You may set one or both, but they must be unique in our system so we can save your child’s progress!
Email can be useful for resetting passwords, but usernames are often easier for the student to type when they’re logging in.
You will then be asked for their first and last name and a password:
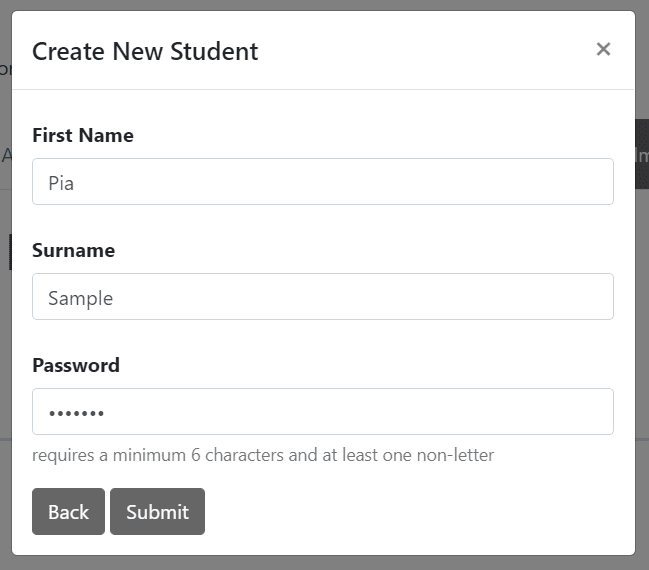
The password must be at least 6 characters with one non-letter.
Here, we’ve set Pia’s password to “Pia2012”, but “sample1” or “happy2” would have worked fine- whatever your child (and you!) will remember.
LINK EXISTING STUDENT
If instead you wanted to LINK to an existing account your child has, you’ll need either their username or email. Whichever you choose, it must already exist in the system!
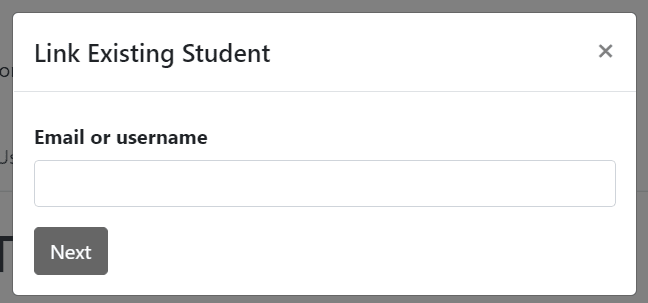
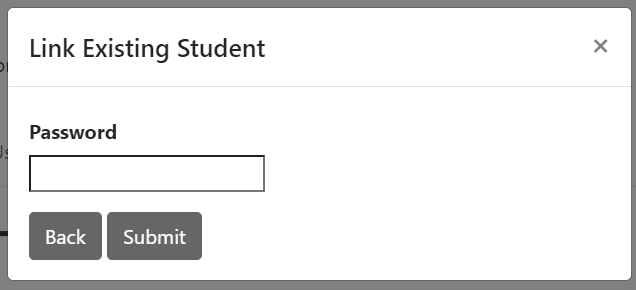
You will be then asked to the password for their existing account:
Whether you created a NEW student or LINKED to an existing account, you should now see the student in this group:

4. Assign the Student a Licence
Click the blue Add License button next to the student.
Note: admins and teachers don’t need licences, only students do!
Note: if the student is an existing account you just linked and they already had a licence assigned, you may be able to skip this step, or you may need to EXTEND an expiring/expired licence.

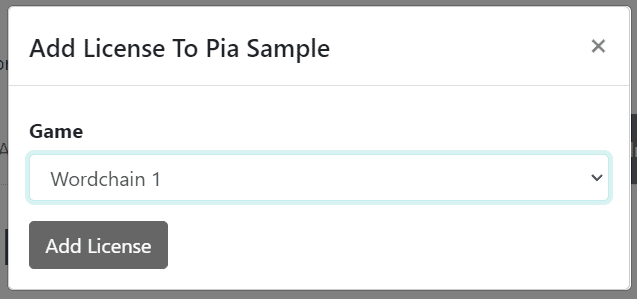
You will be asked for a Wordchain number for the student to begin on:
Your child can now log in at the home page at play.wordchain.co.nz
Full details about how to log in are here.
You can also repeat steps 3 and 4 if you have more children who will be using Wordchain.
That’s it! Your students will be away and flying!
There are more support articles and videos at wordchain.co.nz/support or contact us if you need any help.
